LiftMaster is a top name in the garage door industry, known for its reliable and modern products. Their garage door remotes make it easy and safe for homeowners to access their garages. With features like one-touch operation and advanced connectivity, these remotes are a favorite among many homeowners. Programming your LiftMaster remote might seem tricky, but it is quick and easy. Whether you need to reset it after a battery change or just want to add a new remote, you can do it yourself without calling a garage door repair service.
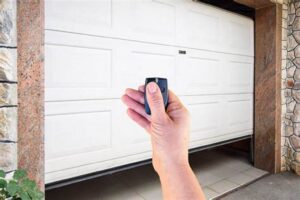
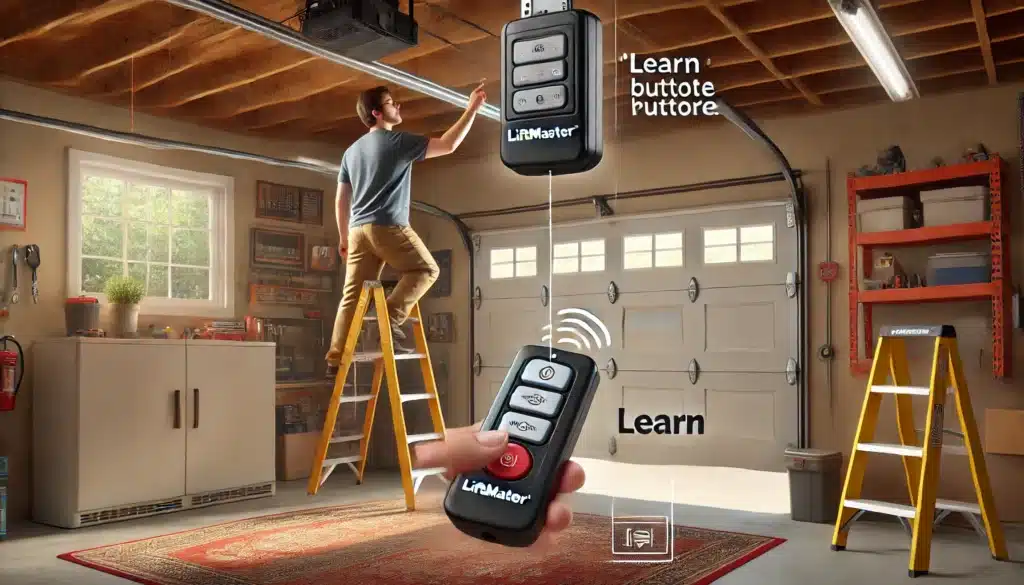
First, find the “Learn” button on your LiftMaster garage door opener. It’s usually on the back or side of the motor unit. Press and release the “Learn” button, then quickly press the button on your remote. You’ll hear a click or a light flash, showing the remote is programmed. If you have multiple remotes, follow these instructions for each one separately. This simple process ensures your remote works ideally without needing professional garage door repair.
Following these steps saves time and avoids the hassle of calling a garage door repair service. Programming your LiftMaster remote is easy and keeps your garage secure and accessible. Enjoy the convenience it brings to your daily routine, enhancing your everyday tasks effortlessly!
Why Properly Programming Your LiftMaster Remote Matters
Properly programming your LiftMaster garage door remote is key for smooth and reliable use. If the remote isn’t set up correctly, you might face problems like the door not opening or closing or the remote not working. By correctly programming your remote, you can enjoy easy access to your garage and avoid security risks.
A well-programmed remote ensures your garage door works perfectly every time, giving you peace of mind. This simple step helps you avoid calling a garage door repair service and keeps your garage secure. Proper programming also means you can count on your remote to work without any issues, making your daily routine smoother.
Whether you come home late at night or leave early in the morning, an adequately programmed LiftMaster remote provides the necessary convenience and safety. Don’t overlook this essential task to keep your garage door operating smoothly and reliably.
How to Program LiftMaster Garage Door Remotes
The programming process for LiftMaster garage door remotes typically involves a few simple steps. Although the exact steps might vary slightly depending on the specific model of your remote and garage door opener, the general process remains consistent.
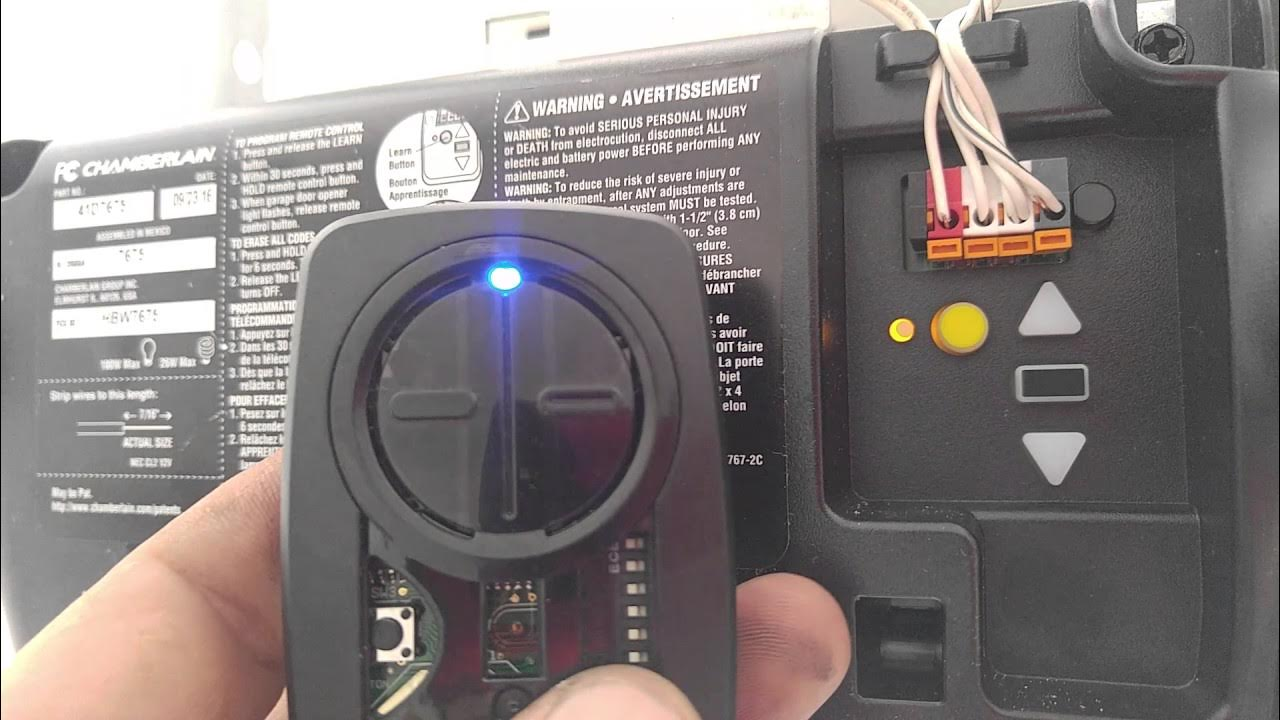
First, find the “Learn” button on your LiftMaster garage door opener, usually located on the back or side of the motor unit. This button is usually found on the back or side of the motor unit, making it easy to identify and access for quick setup. Press and release the “Learn” button, then quickly press the button on your LiftMaster remote. You’ll see a light flash or hear a click, indicating that the remote is successfully programmed.
It’s essential to follow the manufacturer’s instructions carefully to ensure a successful programming experience, avoid potential issues, and ensure the smooth operation of your LiftMaster remote. Proper programming enhances the security of your garage and provides convenience. This simple process can save you from calling a garage door repair service and keep your LiftMaster garage door opener in top working condition.
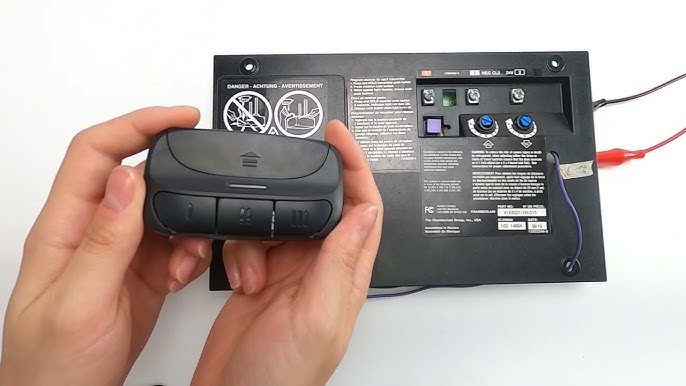
Steps to Program Your LiftMaster Garage Door Remote
Locate the Learn Button
First, find the learn button on your LiftMaster garage door opener. It’s usually located on the motor unit or the wall-mounted control panel. Knowing where this button is will help you correctly set up your LiftMaster remote.
Press the Learn Button
Once you’ve found the learn button, press and hold it until the LED light on the motor unit starts blinking. The blinking light indicates that the LiftMaster opener is in programming mode and ready to connect to your remote. Be patient and wait for the light to blink before moving to the next step.
Press the Remote Button
While the LED light is blinking, press the button on your LiftMaster remote that you want to program. Hold it until the LED light stops blinking, indicating that the remote is now connected to the LiftMaster opener. This step ensures your LiftMaster remote is correctly synced with the opener.
Test the Remote
Finally, test the LiftMaster remote by pressing the button you just programmed. The garage door should open or close, showing that the programming worked. Make sure everything works smoothly before you finish up, testing from different angles and distances if needed.
Fixing Issues During the Programming Process
If you encounter any issues during the programming process, there are a few standard troubleshooting steps you can take:
Check the Battery
Ensure that the battery in your LiftMaster garage door remote is in good condition and properly installed. A weak or incorrectly placed battery can prevent the remote from working. Replacing or adjusting the battery might resolve the issue.
Verify the Learn Button
Confirm that you are pressing the correct learn button on your LiftMaster garage door opener. The learn button is usually located on the motor unit or control panel. Make sure you’re pressing the right one to ensure everything is clear.
Repeat the Process
If the initial programming attempt is unsuccessful, try the process again, ensuring that you follow the steps carefully. Sometimes, a simple mistake can cause the process to fail, so double-check each step. Repeating the process with attention to detail often solves the problem.
Consult the Manufacturer
If you continue to experience issues, refer to the manufacturer’s instructions or contact customer support for further assistance. The manufacturer’s guidance can provide specific troubleshooting steps for your LiftMaster model. Feel free to seek help to get your remote working properly.
Features and Functions of LiftMaster Garage Door Remotes
LiftMaster garage door remotes offer a variety of advanced features and functionalities that can enhance your overall user experience. These include:
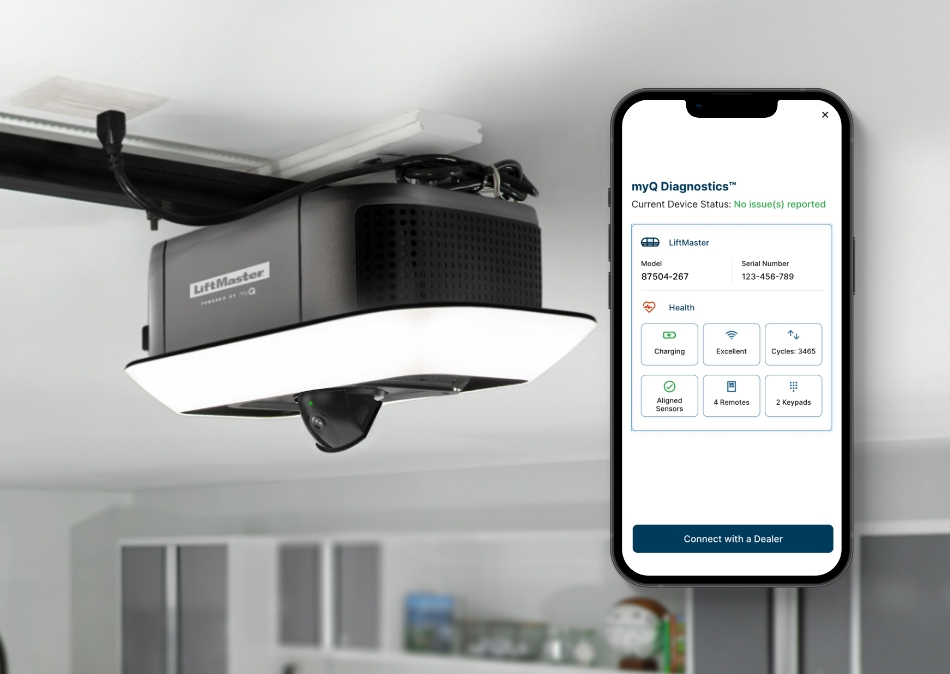
- MyQ Connectivity: Many LiftMaster remotes are compatible with MyQ smart home technology, allowing you to control and monitor your garage door from your smartphone or other connected devices.
- Keyless Entry: Some LiftMaster remotes have a keypad feature, enabling you to access your garage without a physical key or remote.
- Vacation Lock: This feature allows you to temporarily disable your garage door opener, providing an added layer of security when you’re away from home.
- Rolling Code Technology: LiftMaster remotes utilize rolling code technology, which changes the access code with each use, making it more secure against unauthorized access.
Tips for Maintaining and Extending the Life of Your LiftMaster Garage Door Remote
To ensure the longevity and optimal performance of your LiftMaster garage door remote, consider the following maintenance tips:
Replace the Battery Regularly
Check the battery in your LiftMaster garage door remote periodically and replace it when necessary to maintain reliable operation. A fresh battery ensures that your LiftMaster remote works smoothly whenever you use it. Regular battery checks can avoid unexpected failures and keep your LiftMaster garage door opener functioning correctly.
Keep the Remote Clean
Wipe the LiftMaster remote with a soft, dry cloth to remove any dirt or debris accumulating over time. Keeping your LiftMaster garage door remote clean helps ensure that the buttons function correctly and the remote stays in good condition. A clean LiftMaster remote can perform better and last longer, providing reliable operation for your garage door.
Avoid Extreme Temperatures
Protect your LiftMaster remote from direct sunlight, extreme heat, or cold, as these conditions can negatively impact the battery and internal components. Extreme temperatures can cause the battery to drain quickly or damage the internal parts of your LiftMaster garage door remote. Store your LiftMaster remote in a moderate environment to keep it functioning well.
Store the Remote Properly
When not in use, store your LiftMaster garage door remote in a safe, dry place to prevent damage or loss. Proper storage helps protect your LiftMaster remote from accidental damage and keeps it ready for use when needed. Properly storing your LiftMaster garage door remote can extend lifespan and maintain performance.
Methods for Programming LiftMaster Garage Door Remotes
While the standard programming process outlined earlier is the most common method, there are alternative ways to program your LiftMaster garage door remote, depending on your specific needs or preferences:
Keypad Programming
Some LiftMaster garage door openers allow you to program the remote using the keypad on the wall-mounted control panel. This method can be convenient and straightforward, giving you a quick way to sync your remote without needing to access the motor unit. Refer to your LiftMaster manual for specific keypad programming instructions.
Smartphone App Programming
If your LiftMaster garage door opener is compatible with the MyQ smart home system, you can program your remote using the MyQ mobile app. This app lets you control your new garage door from your smartphone, making it easy to program and manage your LiftMaster remote from anywhere. Check the MyQ app for detailed programming steps.

Professional Installation
For those who prefer a hands-off approach or have a more complex garage door system, consider having a professional installer program your LiftMaster remote. Professional installation ensures that your LiftMaster remote is set up correctly and efficiently. An expert can handle the programming process and troubleshoot any issues, providing peace of mind and reliable operation.
Frequently Asked Questions
How to Manually Reset Your Garage Door Opener
Unplug the unit from the power source for 30 seconds to manually reset your garage door opener. Plug it back in and press and hold the “Learn” button until the LED light turns off, clearing the memory. This ensures your garage door repair needs are addressed efficiently.
How do I program my garage door opener?
Press the “Learn” button on your garage door opener, then press and hold the button on your remote for 30 seconds until the opener light blinks. This program your remote for seamless operation, making garage door repair tasks straightforward.
How to reset the LiftMaster myQ garage door opener?
To reset your LiftMaster garage door opener, press the “Learn” button until the LED light turns off, clearing all codes. Follow the myQ app instructions to reconnect and set up your opener again, ensuring effective garage door repair.
Can I reset my garage door opener without the original code?
Yes, you can reset your garage door opener without the original code by pressing and holding the “Learn” button until the LED light turns off, which clears all previous codes. You can then reprogram new codes, facilitating smooth garage door repair.
Where is the learn button on LiftMaster?
The “Learn” button on a LiftMaster garage door opener is usually found near the antenna wire on the back or side of the motor unit. It is a small, square button essential for garage door repair and programming tasks. For precise location, refer to your manual.
Conclusion
By following these simple steps, you can easily program your LiftMaster garage door remote and enjoy hassle-free access to your garage. If you ever face any issues or need further assistance, Team Taylor Doors is here to help. As a trusted garage door contractor, we specialize in garage door repair and maintenance, ensuring your garage door system works flawlessly. Don’t let a minor issue disrupt your day – contact Team Taylor Doors for expert help.
Our experienced technicians are dedicated to providing top-notch service, whether it’s troubleshooting a LiftMaster garage door remote program issue or addressing more complex garage door repair needs. We understand the importance of a secure and smoothly operating garage door, so we are committed to delivering prompt and reliable solutions.
At Team Taylor Doors, we pride ourselves on exceptional customer service and attention to detail. From programming your LiftMaster remote to regular maintenance and emergency repairs, we’ve got you covered. Experience the peace of mind that comes with a well-programmed LiftMaster garage door remote and the reliable support of your local garage door contractor. Contact Team Taylor Doors today for all your garage door repair and maintenance needs.
We’re here for all your garage door repair in Kansas City needs, ensuring your LiftMaster system operates smoothly and efficiently. Reach out to us today!
End Note
If you’re encountering any issues with your garage door, Team Taylor Doors is here to assist. We specialize in garage door repair to ensure your door operates smoothly and securely. Our experienced technicians are ready to tackle any problem you might have. Discover our extensive services at Team Taylor Doors, including expert keypads and remote programming, high-quality garage door openers, and reliable Paola garage door repair.
Browse through our gallery to see our remarkable past projects, and visit our blog for valuable tips and insights. We also provide maintenance advice to keep your garage door in excellent condition year-round. Stay connected with us on Facebook, Instagram, and YouTube for the latest updates, special offers, and more.
Our mission is to deliver outstanding service and ensure your garage door is always at its best. If you have any questions or need prompt assistance, please contact us. We’re dedicated to providing top-notch garage door repair services to keep your home safe and secure!