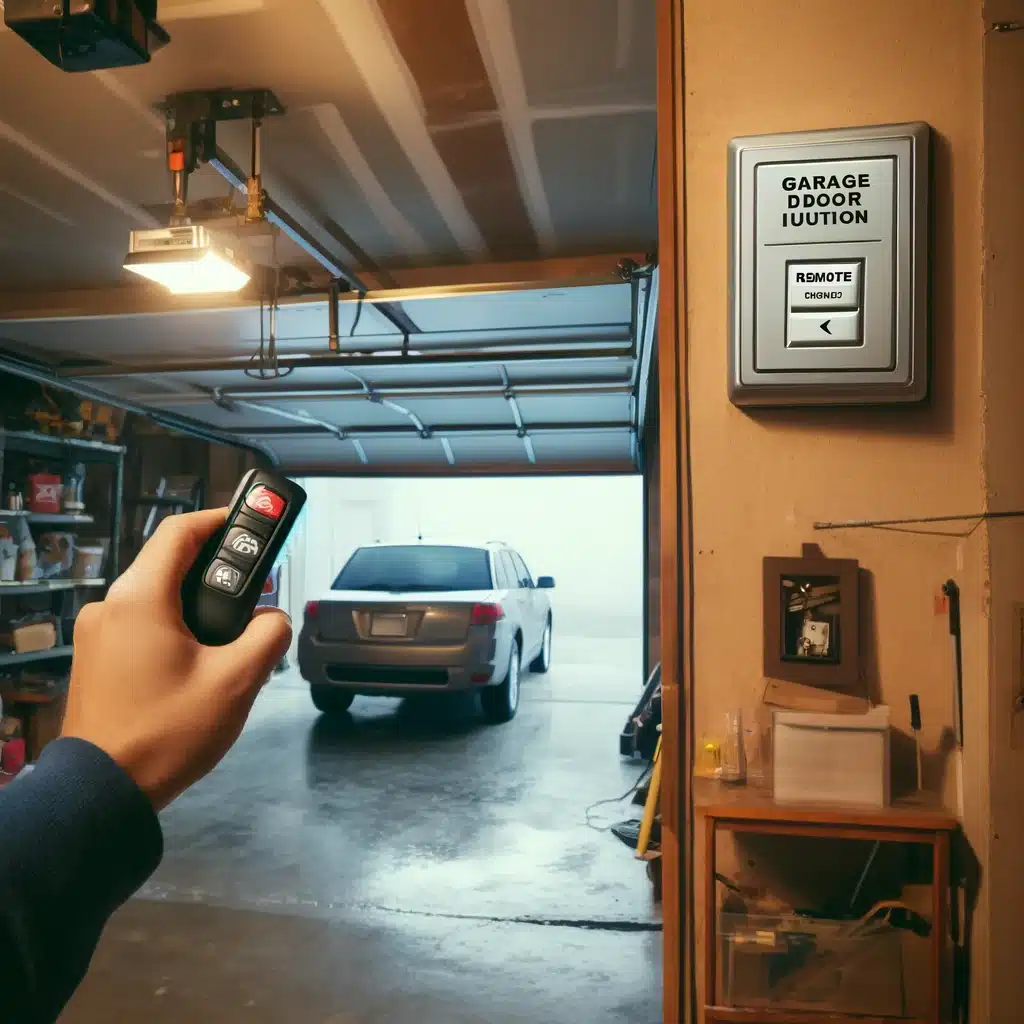
Imagine heading out for a busy day, pressing your garage door wall button, and nothing happens—yet your remote works just fine. This common scenario can disrupt your daily routine, leaving you puzzled about the next steps. When your garage door wall button is not working but the remote works, it’s not just an inconvenience; it’s a call to action. This article will explain why this happens, how to fix it, and how to prevent it from happening again. We aim to help you keep your garage door working smoothly and reliably.
Troubleshooting Steps for Common Causes of Garage Door Wall Button Issues
When faced with the issue of your garage door wall button not working but the remote working, it’s essential to address this common yet frustrating problem efficiently. This article aims to guide you through identifying and resolving the underlying issues that might be causing this specific malfunction in your garage door system.
Power Issues
When a garage door wall button fails to function while the remote control still operates, it is often due to power issues. The initial troubleshooting step involves thoroughly inspecting the power supply to the wall button. Here’s how to proceed:
-
- Visual Inspection: Check for any loose, frayed, or disconnected wires at both the wall button and the opener unit. These wires are crucial for transmitting power and signals.
-
- Circuit Breaker Check: Sometimes, the issue could be as simple as a tripped circuit breaker. Locate the breaker that corresponds to the garage and ensure it’s in the ‘on’ position. If it’s tripped, reset it and check if the wall button resumes functioning.
-
- Voltage Testing: Using a multimeter, test the voltage at the wall button terminals to confirm that the button is receiving power. If the voltage reading is significantly lower than expected, there may be an issue with the wiring or the power source itself.
Button Wiring and Connections
Faulty wiring or poor connections can prevent the wall button from functioning correctly. Here’s a detailed approach to addressing these issues:
-
- Inspect Wiring: Examine all the wiring from the wall button to the garage door opener for any signs of wear, damage, or disconnection. Pay special attention to any points where wires may be pinched or have come loose from their terminals.
-
- Secure Connections: If you discover loose connections, securely reattach them and ensure that all terminal screws are tightened. If you are unfamiliar with handling electrical wiring, consider consulting a professional to avoid potential hazards.
-
- Continuity Testing: For a more thorough check, use a multimeter to test continuity. This test helps ensure that the electrical path is complete and there are no breaks in the wiring.
Button Malfunction
Over time, physical wear and tear can impair the functionality of the wall button. Here’s how to diagnose and possibly rectify button malfunctions:
-
- Physical Inspection: Examine the button for any physical damage such as cracks, wear, or debris that might obstruct proper function. Clean around the button carefully to remove any dust or obstructions.
-
- Functional Testing: Press the button at various points and apply different pressure levels to see if it responds intermittently. This can indicate internal faults or wear.
-
- Replacement Consideration: If the button does not respond consistently or feels stuck, it might be time to replace it. Wall buttons are generally inexpensive and straightforward to install.
Garage Door Opener Receiver Issues
The receiver in your garage door system processes signals from both the remote and the wall button. Different interactions can lead to functionality issues:
-
- Receiver Reset: Try resetting the receiver according to the manufacturer’s instructions, which often involves unplugging the unit and then reconnecting it after a short period.
-
- Signal Check: Ensure there’s no interference or obstruction between the receiver and the wall button. Objects placed near the receiver can sometimes block or deflect the signal.
-
- Diagnostic Modes: Some garage door openers have diagnostic settings that can help identify specific issues with signal reception or processing.
Interference and Configuration Errors
External interference and improper configuration settings can also lead to a non-functioning wall button:
-
- Identify Interference Sources: Look for potential sources of interference near your garage door system. Devices such as wireless routers, baby monitors, and home security systems can emit signals that might disrupt the wall button’s operation.
-
- Configuration Review: Check the garage door system’s settings. Ensure that the wall button is not accidentally disabled or bypassed in the configuration. Some systems allow for customization of controls, which might inadvertently lead to issues.
By following these troubleshooting steps, you can systematically diagnose and resolve the issue of a garage door wall button not working but remote works. If the problem persists despite these efforts, it might be prudent to consult with a professional technician to investigate further and address the issue.
Solutions and Fixes: Replacing or Repairing the Garage Door Wall Button
If initial troubleshooting steps don’t fix the problem with your garage door wall button, it may be time to consider more extensive solutions and fixes. Here’s a detailed guide on how to approach repairing garage door wall button not working but remote works.
Replacing the Wall Button
1. Purchase the Right Replacement Button: Start by finding the correct replacement button for your garage door system. You can find this information in the garage door opener’s manual or by searching online using the model number of your opener. Ensure the new button is compatible with your system to avoid compatibility issues.
2. Power Off the System: Before starting any work, ensure safety by disconnecting the power to your garage door system. This can typically be done at the circuit breaker.
3. Remove the Old Button: Unscrew the old wall button from the wall and disconnect the wires carefully. Note how the wires are connected (taking a photo can help) to make sure you can connect the new button correctly.
4. Connect the New Button: Attach the wires to the new button according to your previous note or photo. Ensure that connections are secure and that there is no exposed wiring.
5. Attach the Button to the Wall: Once the wires are connected, screw the new button onto the wall. Make sure it’s firmly in place and not wobbling, as that could affect functionality.
6. Power On and Test: Reconnect the power at the circuit breaker and test the new wall button to ensure it works correctly. If it doesn’t operate as expected, double-check the wiring and connections.
Repairing the Wall Button
If the issue with the wall button seems minor, such as a loose connection or dirty contacts, you might be able to repair it instead of replacing it.
1. Clean the Contacts: If the button appears to be dirty or has debris that might hinder electrical contact, carefully clean the contacts with a small brush or a blast of compressed air.
2. Secure Loose Connections: Tighten any loose screws on the button and ensure that all wire connections are secure. Sometimes, merely securing a loose wire can resolve the issue.
3. Check for Wear: Inspect the button for any signs of wear or damage. If the contacts inside the button are worn out, it might be better to replace the button entirely.
Professional vs. DIY Solutions: When to Call a Technician
DIY Solutions
-
- Simple Replacements and Basic Troubleshooting: If you’re comfortable with basic household tools and follow safety protocols, DIY can be a good choice. Replacing a garage door wall button is generally a straightforward task that requires minimal electrical knowledge.
-
- Preventive Maintenance: Regularly checking and cleaning the button and associated wiring can prevent many issues and is easily done without professional help.
When to Call a Professional Technician
-
- Complex Electrical Issues: If voltage tests suggest deeper electrical issues or if multiple components of the garage door system are failing, it’s safer to consult a professional.
-
- Continuous Malfunction: If the new button installation does not resolve the issue or the system shows signs of more significant malfunction after basic troubleshooting, professional diagnostics might be required.
-
- Safety Concerns: Anytime you’re not confident in your ability to safely complete repairs or replacements, it’s wise to call a professional. Garage door systems are under high tension and involve electrical components that can pose serious risks.
Benefits of Professional Help
-
- Expertise and Experience: Technicians can diagnose and resolve complex issues more quickly and efficiently.
-
- Warranty and Assurance: Professional repairs often come with a warranty, giving you peace of mind.
-
- Long-Term Savings: Properly diagnosing and fixing an issue can prevent costly repairs or replacements down the line.
Deciding between a DIY approach and calling a technician depends on your skills, the complexity of the issue, and considerations about safety and cost. Always prioritize safety and long-term functionality in your decision-making process.
Preventive Measures for Garage Door Buttons and Opener Systems
Routine Maintenance Tips
1. Comprehensive Visual Inspections
-
- Frequency and Focus: Conduct these inspections on a monthly basis. Pay close attention to any new signs of wear or damage not only on the wall button but also on the overhead tracks, springs, and cables.
-
- Detecting Minor Changes: Note any changes in the alignment or operation of the door. Misalignment can strain the door mechanism, leading to more severe damage over time.
2. Thorough Cleaning
-
- Detail in Cleaning: Use a damp cloth to wipe down the wall button and a mild cleaner on the garage door opener’s exterior. Avoid harsh chemicals that could damage the system.
-
- Prevent Build-up: Regular cleaning prevents the build-up of dirt and grime that can eventually interfere with the mechanical functions of the door opener.
3. Operational Testing
-
- Regular Functional Tests: Monthly tests of the wall button and remote controls are recommended. Ensure that each function, including the emergency release, operates as expected.
-
- Listen for Noises: During operation, listen for grinding or scraping sounds. Such noises often indicate that parts of the mechanism are out of alignment or need lubrication.
4. Lubrication Protocols
-
- Appropriate Lubricants: Use lubricants specifically designed for garage doors. Silicone-based sprays or white lithium grease are good options for chains, screws, and tracks.
-
- Avoid Over-lubrication: Apply lubricants sparingly. Excessive lubrication can attract dirt and debris, which can gum up the works.
5. Tightening and Securing
-
- Regular Hardware Reviews: About every six months, go through and check that all hardware is snug. Vibration from daily operation can loosen parts over time.
-
- Alignment Checks: Ensure that the tracks are parallel and level. This helps prevent the door from wearing out prematurely on one side.
6. Battery Maintenance
-
- Consistency in Checks: Regular battery checks should be part of your routine, especially before seasons of extreme weather, as temperature fluctuations can affect battery performance.
Importance of Regular Inspections
-
- Avoiding Costly Repairs: Regular maintenance can catch issues like loose tracks or degrading springs before they fail, costing much more in repair or replacement.
-
- Preventative Safety Checks: A malfunctioning garage door can be a significant safety hazard. Regular checks of the auto-reverse mechanism and photo eye sensors can prevent injuries and accidents.
-
- Maximizing System Life: Well-maintained garage doors have fewer breakdowns and maintain their value and effectiveness longer than neglected systems.
-
- Efficiency: A well-oiled and properly aligned door operates more efficiently, using less energy and reducing strain on the opener.
-
- Reliability for Daily Use: When you leave for work or come home, a reliable garage door is one less hassle to worry about. Regular maintenance ensures it works every time.
-
- Smooth Operation: Regular maintenance leads to smoother operation, reducing noise and ensuring the door opens and closes as designed.
Integrating these expanded maintenance practices into your routine can significantly enhance the operation and lifespan of your garage door system, ensuring it remains functional, safe, and effective for years to come. Regular inspections not only prevent unexpected malfunctions but also protect against potential safety risks, providing peace of mind.
FAQs
What should I do first if my garage door wall button is not working but the remote works?
-
- Begin by checking if there’s a simple issue, such as loose wiring or a faulty connection. Inspect the wires leading to the wall button to ensure they are secure and not damaged. It’s also a good idea to check for any obstructions or debris around the button that might prevent it from functioning properly.
Can weather affect the functionality of my garage door wall button?
-
- Yes, extreme temperatures and humidity can affect the performance of your garage door wall button. Cold weather can cause the wires to contract and lose connectivity, while humidity can lead to moisture build-up that might interfere with the button’s electrical components.
How often should I replace my garage door wall button?
-
- Typically, garage door wall buttons do not need frequent replacement unless they show signs of malfunction or wear. Regular maintenance and checks can extend their lifespan. Consider replacing the button if it becomes unresponsive or if there are visible signs of damage.
Is there a way to reset the wall button to see if it resolves the issue?
Some wall buttons have a reset feature or require a specific reset procedure, such as disconnecting the power to the garage door opener for a few minutes and then reconnecting it. Consult your garage door opener’s manual for specific reset instructions.
How can I test if my garage door wall button is receiving power?
-
- Use a multimeter to check for voltage at the button terminals. Set the multimeter to measure voltage and place the probes on the terminals; if the multimeter reads close to what your home’s power supply should be (typically 110-120 volts in the US), the button is receiving power. If not, there might be a disconnect somewhere in the circuit, or the button itself may need replacing.
Maximize Your Garage Door’s Performance: Expert Repair and Maintenance Tips from Team Taylor Doors
Always prioritize safety when dealing with electrical repairs, and don’t hesitate to consult with or hire a professional if the situation appears beyond your skill level. Regular maintenance and prompt attention to issues can help extend the life of your garage door components and ensure reliable operation. It’s important to fix a broken garage door wall button right away to avoid bigger issues later and knowing how your garage door works can save you money on repairs.
For achieving the best performance and minimizing the risks that come with attempting do-it-yourself repairs on intricate systems, it’s crucial to recognize the advantages of professional servicing. If you come across issues that exceed basic troubleshooting, or if you are uncertain about the specifics of the problem like garage door wall button not working but remote works, it’s highly recommended to consult with professionals like Team Taylor Doors for expert help.
When it comes to reliable garage door repair Kansas City, Team Taylor Doors is the premier choice. Their commitment to excellence guarantees that your garage door wall button functions perfectly, enhancing both the functionality and safety of your home. Contact Team Taylor Doors today to schedule a consultation or service appointment and experience the peace of mind that comes with exceptional garage door care. Trust Team Taylor Doors—where quality meets reliability in garage door servicing.

